While planning my new project in my mind I make mini foods into my Etsy shop. Mostly bakery goods and vegetables, all of them in a handmade basket. Now I can weave a basket really fast, but I have to learn other weaving techniques.
This fruit basket was an order. I think mixed fruits look more better than only one type in a basket. These vivid colors are so wonderful!
Jan 20, 2011
Jan 10, 2011
The smokey kitchen - To the memory of my great-grandmother
The smokey kitchen is ready. I opened this blog about one year ago. I think this kitchen is a wonderful gift for the anniversary. I know I didn't show too many photos about the making process, but I destined it for a great surprise.
It was a pleasure to make it, the spirit of the old times enchanted me. I'm sure I will often return to the theme of the old country life in making miniature scenes in the future.
I made this kitchen into an open box, so it would be a three-dimensional painting on a shelf or a desk. I don't know the appropriate word for such a display, can you help me about it? Roombox or diorama or miniature scene?
So here are the photos. I don't write an ethnographical description about this old kitchen, the pictures tell you everything.
When the ethnographers took photos of the oroginal smokey kitchens in the early decades of the last century they made only black and white pictures. So I edited a photo to make it very old. This is my favorite.
Jan 5, 2011
Tutorial - Heart cutter
Happy New Year!
Oh, this period of the year is very very busy in my life! I spent a wonderful holiday with my family. I know you forgive me I neglected my blog so long. I hope I can make it up to you for a tutorial.
I'm the one who don't like if my tools dictate what I can make. So I make my own tools to produce anything I want. I know there are many mini cutters you can buy, but sometimes you need a different size of them or simply you don't want to pay for them. Now I show you how I make my own heart cutters.
You need: strip of copper sheet (or a piece of tin), any cylindrical thing (this time I used a brush), sciccors or snips and glue. The width of the strip will be a height of your cutter.
Double up the strip and smooth the edge with the brush.
Open apart the strip. Now you have the two wings of the heart.
Cut off the unnecessary part of one wing.
Then fold the other wing onto this short one.
Now you need some glue to fix the overlap. While drying use a tweezer to press together the two parts.
If your heart is too angled or need some correction you can shape it by pressing around the brush.
If you worked well you have a perfect heart cutter.
For a bigger cutter you need a stiffer, thicker material.
I made various sizes of heart cutters, the least is 2.5 mm. These cakes and shortbreads were made by using my own cutters.
Excuse me if my guide is not very clear, but the photos help you understand this tutorial.
Oh, this period of the year is very very busy in my life! I spent a wonderful holiday with my family. I know you forgive me I neglected my blog so long. I hope I can make it up to you for a tutorial.
I'm the one who don't like if my tools dictate what I can make. So I make my own tools to produce anything I want. I know there are many mini cutters you can buy, but sometimes you need a different size of them or simply you don't want to pay for them. Now I show you how I make my own heart cutters.
You need: strip of copper sheet (or a piece of tin), any cylindrical thing (this time I used a brush), sciccors or snips and glue. The width of the strip will be a height of your cutter.
Double up the strip and smooth the edge with the brush.
Open apart the strip. Now you have the two wings of the heart.
Bend one of the wing around the brush, then the other wing.
Now you have a symmetrical heart shape.
Cut off the unnecessary part of one wing.
Then fold the other wing onto this short one.
Now you need some glue to fix the overlap. While drying use a tweezer to press together the two parts.
If your heart is too angled or need some correction you can shape it by pressing around the brush.
If you worked well you have a perfect heart cutter.
For a bigger cutter you need a stiffer, thicker material.
I made various sizes of heart cutters, the least is 2.5 mm. These cakes and shortbreads were made by using my own cutters.
Excuse me if my guide is not very clear, but the photos help you understand this tutorial.
Dec 18, 2010
Kitchen table
This is the table for the smoky kitchen I made. There is some crazyness in making something with so much care (accurate joints, fine sanding, even painting) then coming at it with a knife to do so many scrapes and cracks as several years of use can do. But who says I'm not crazy? Perhaps the table needs more damages!
Dec 14, 2010
Flesh
Modelling flesh is a hard challenge. This is not my first try, but the previous ones were awful. First I tried to mix a fleshlike color from fimo, but it's impossible. The flesh is different everywhere! So I gave up the mixing, builded up the shape only from white, and added all the colors after shaping.
Now it's on my Etsy shop, but telling the truth I don't know who needs a halved pig. Perhaps it's good for a miniature butcher's or a historical scene. At the worst it would be a perfect Christmas gift for a butcher as a cellphone charm!
Dec 8, 2010
New project
In the last two or three months I was engaded with my Etsy shop, but I very missed making a roombox. Many ideas are spinning in my mind, the first is an old Hungarian country kitchen, the so-called smoky kitchen. It didn't have any chimney, so the smoke left the house right through the door. Of course the floor was simple the packed soil. This kitchen always had a furnace, sometimes with a behive shape, like this. They used this furnace for baking bread and heating the kitchen in winter. There was a smaller spare oven next to the furnace for cooking in summer.
For the furnace and the oven I used box cardboard, then I coated it with gypsum. As you can see I used everything in our house to fixed the parts while drying. My husband had bought these weight discs to train himself. Do you guess how many times he used these plates? You can divide the number you thought by ten. Now I realized how they be right for keeping the parts from moving. And in the background there are my childrens' building blocks making the perfect mitre tool.
I made this tiny cheese board and the strawberry sponge cake for my Etsy shop.
For the furnace and the oven I used box cardboard, then I coated it with gypsum. As you can see I used everything in our house to fixed the parts while drying. My husband had bought these weight discs to train himself. Do you guess how many times he used these plates? You can divide the number you thought by ten. Now I realized how they be right for keeping the parts from moving. And in the background there are my childrens' building blocks making the perfect mitre tool.
I made this tiny cheese board and the strawberry sponge cake for my Etsy shop.
Dec 6, 2010
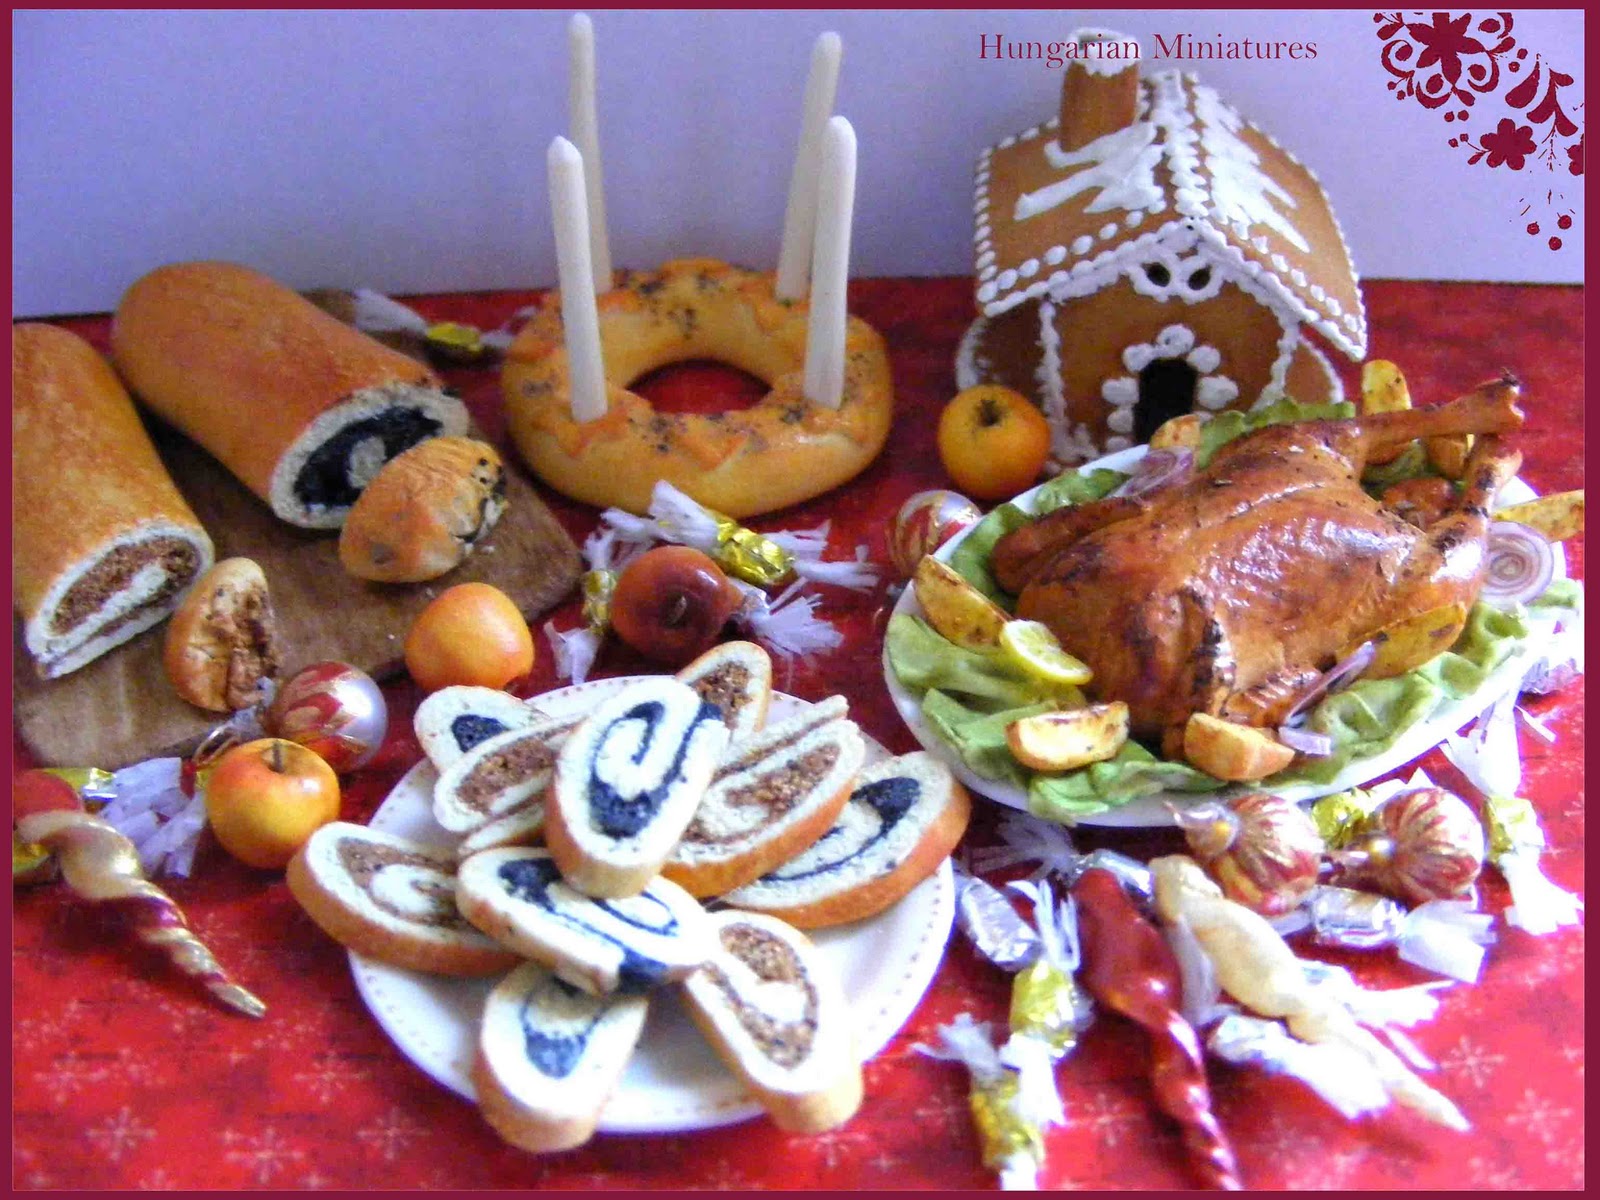
Christmas dinner
I showed all the Christmas miniatures I had made in the last month, this is only a scene with these minis. I entered for a Hungarian polymer clay competition in Christmas theme. In Hungary using the polymer clay is in its infancy, almost everything is some jewelry made from fimo or other brand of clay. So only my work is a miniature amongst the others, and all this miniature world is absolutely unknown. The editor of this competition put only the "Christmas dinner" title next to my photo, but not mentioned that it's a miniature. Somebody of the commenters confusedly asked "This is a very nice arrangement, but what's from polymer clay?". This is the best praise about my work I've ever got.
I sent also this second photo for the editor, but only one was allowed to participate in the competition, and she choosed the photo without the dice.
Subscribe to:
Posts (Atom)