After a long break, inspired by the spring I decided to make a garden scene. The Hungarian country kitchen is resting a little bit, because I had a problem with it I can't solve this time. The planned scene is a garden shed (actually only one wall) and a potting table.
The slates are made of balsa wood. This is the most treatable wood type, you can cut it by a blade.

After setting the window only the painting was behind.

I chose a nice yellow shade, mixing tempera.

Then I aged the brisk colour with grey, so the wood got a shabby, old effect. I smeared the corner of the window with nail polish, then dispersed some white and grey chalk powder onto it. Tadam! Messy window!


 Some other thing made for the scene: a straw hat (made of Aida cross-stich material), two more pots (one is used a bit) and a hose.


 I made this box for plant seeds. This year I opened the seed pockets of my real garden very deliciously to preserve them for scanning.
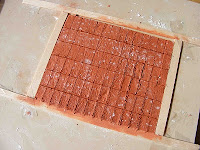
 The great pot is made of airdry clay, too.


 I chose a nice yellow shade, mixing tempera.